
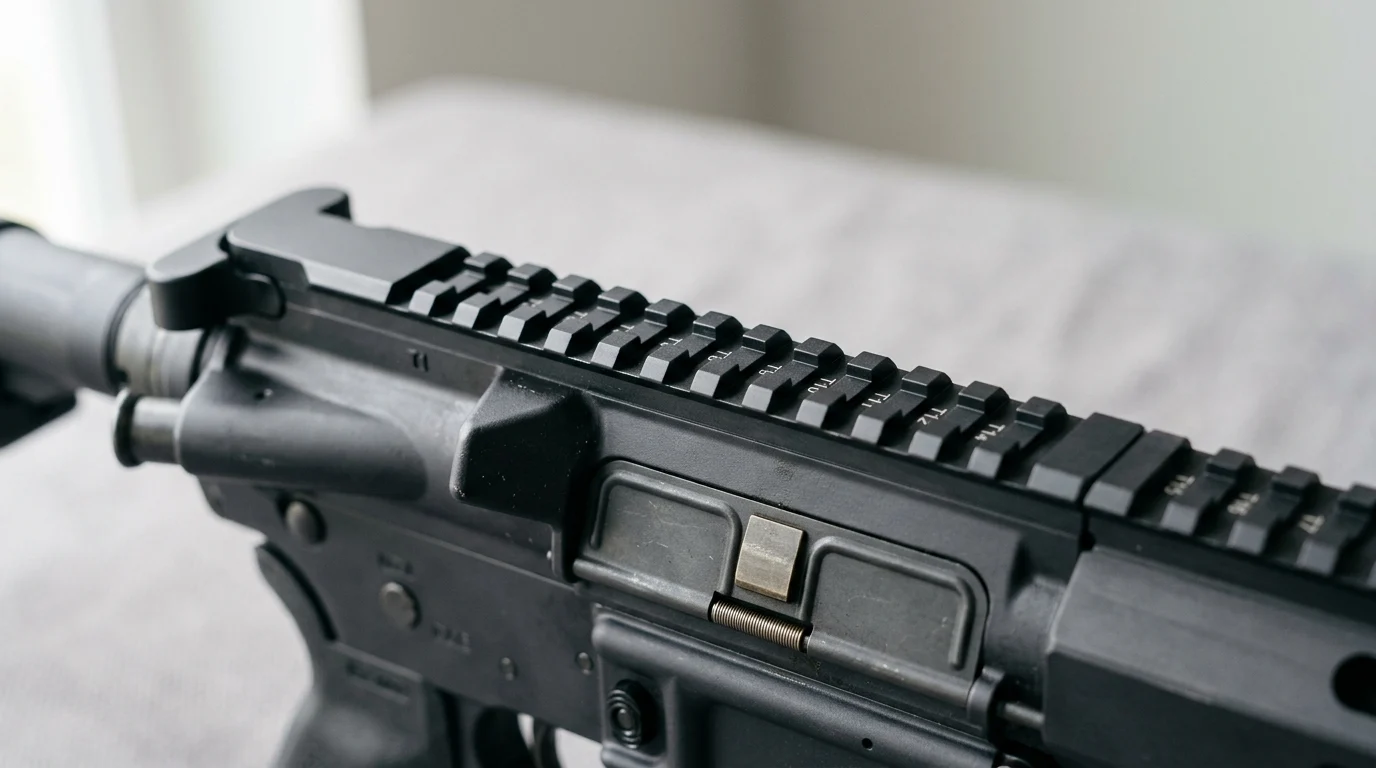
A rifle optic is only as dependable as the hardware holding it in place. On modern AR-15 platforms, the Picatinny rail provides the standard interface, but mount height, clamp quality, ring diameter, and torque control all determine whether the system stays zeroed under recoil. A lower 1/3 setup is especially popular because it balances a more open sight picture with practical backup sight integration, typically placing the optic centerline around 1.57 to 1.64 inches above the rail. This guide explains what that height means, how it applies to red dots and magnified scopes, and which mount specifications matter most for repeatable, reliable performance.
Lower 1/3 AR-15 Scope Mount Basics
Mounting a new optic on a rifle requires reliable hardware to maintain performance. For the modern AR-15, the interface between the optic and the receiver is almost universally the Picatinny rail. Among the myriad of height options available, the lower 1/3 configuration stands out as a practical choice for shooters seeking an uncluttered field of view alongside reliable backup sight integration.
What Lower 1/3 Co-Witness Means
The term "lower 1/3 co-witness" describes a specific geometric relationship where the optical centerline rests approximately 1.57 to 1.64 inches above the top of the rail. You can verify this height by measuring from the top of the Picatinny rail to the center of the optic's main tube or lens. For non-magnified optics like red dots or holographic sights, this means the mechanical backup iron sights sit in the bottom third of the viewing window.
While traditional rifle scopes do not co-witness with iron sights, using a lower 1/3 height (often framed as "scope height over bore" in this context) for magnified optics remains highly popular. This taller stance keeps the primary sight picture unobstructed by fixed front sight posts and encourages a more upright, natural head position. This is beneficial for shooters wearing plate carriers or electronic ear protection, though it should be noted that operators using night vision goggles for passive aiming typically require even taller mounts, such as 1.93-inch or 2.26-inch centerlines.
Key Mount Specs for Height, Fit, and Repeatability
A mount must reliably hold zero when the rifle is subjected to recoil. High-quality lower 1/3 mounts are precision-machined to clamp securely onto the 1913 MIL-STD rail without crushing the internal erector tubes of the optic. Shooters must match the mount's ring diameter exactly to their optic—typically 1 inch, 30mm, or the 34mm standard used in heavy-duty tactical scopes. Fit also extends to the shooter; a lower 1/3 height requires evaluating stock comb and cheek-weld compatibility to ensure a consistent sight picture.
Repeatability is another critical specification. Premium options advertise a minimal return-to-zero (RTZ) variance when removed and reattached. A mount that exhibits a significant point-of-impact shift after being reinstalled at the same rail slot is unsuitable for duty or defensive use.
How to Compare Picatinny Rail Mounts
Evaluating the aftermarket for a new mount requires looking past aesthetics. While skeletonized cuts reduce weight, the true value of a mount lies in its material composition and the reliability of its locking mechanism.
Material, Clamp Design, and Torque Specs
Most quality mounts are machined from either 6061-T6 or 7075-T6 aluminum. While 6061 is adequate for standard range use, 7075 offers higher tensile strength for duty-grade setups. Proper clamp design distributes pressure evenly, but users must respect torque specifications to avoid tube crushing or a loose optic. Overtightening is a primary cause of optic failure, making a certified torque wrench a mandatory tool for installation.
It is critical to note that torque values depend entirely on the specific mount and optic manufacturer, not simply on whether the mount is made from 6061-T6 or 7075-T6 aluminum. The table below provides general reference ranges based on material strength, but users must always defer to their specific optic and mount manuals to avoid damaging their equipment.
| Material Type | Typical Tensile Strength | General Ring Torque Range | General Base Torque Range |
|---|---|---|---|
| 6061-T6 Aluminum | 45,000 psi | 15 – 18 in-lbs | 35 – 45 in-lbs |
| 7075-T6 Aluminum | 83,000 psi | 18 – 20 in-lbs | 45 – 65 in-lbs |
Quick-Detach vs Fixed Mount Options
The debate between Quick-Detach (QD) and fixed mounts ultimately boils down to a trade-off between speed and mechanical simplicity. A QD system utilizes adjustable cam-locking levers that allow the user to rapidly remove the optic from the rifle if the glass shatters, fogs up, or if the battery dies during a critical moment.
However, this mechanical complexity adds both weight (usually 1.5 to 3 ounces) and manufacturing cost. Fixed mounts, utilizing simple half-inch hex nuts or Torx crossbolts, offer a rugged, set-and-forget solution. They are mechanically simpler, utilize high-strength Grade 8 steel fasteners, and are generally more cost-effective to produce, but they require a dedicated tool for removal in the field.
How to Choose and Source the Right Mount
Selecting the right hardware requires matching the shooter's anatomy to the rifle's geometry. Understanding the nuances of eye relief and specific use-case requirements ensures the final build performs reliably in the field.
Verify Rail Fit, Eye Relief, and Optic Compatibility
The AR-15 receiver is relatively short, presenting a unique challenge for mounting magnified optics. To achieve proper eye relief—typically requiring 3 to 4 inches of distance between the ocular lens and the shooter's eye—a cantilever design is often necessary. These specialized mounts push the optic forward by 2 or 3 inches, allowing proper placement without bridging the upper receiver and the handguard.
When browsing for accessories, verify that the cantilever offset matches the specific eye-box requirements of the chosen glass, ensuring a full sight picture upon establishing a cheek weld.
Match the Mount to Range, Duty, or OEM Use
Application dictates the required durability of the mount. A casual shooter can utilize an entry-level cast-aluminum mount for light range use, though cast construction is not recommended for defensive, duty, or heavy-recoil applications due to its lower structural integrity. Law enforcement and competitive shooters routinely invest in billet 7075-T6 hardware designed to survive harsh conditions and impacts.
Ultimately, a rifle is an integrated system. Just as a precision shooter might carefully select a stabilizing rifle bipod, they must also choose a lower 1/3 mount that guarantees their point of aim remains consistent.
To ensure optimal performance and safety, follow this final installation checklist:
- Avoid bridging the gap: Never mount the optic or its base across the upper receiver and the handguard, as handguard flex will destroy the rifle's zero.
Key Takeaways
- Choose a lower 1/3 mount height of about 1.57 to 1.64 inches when you want a clearer optic window with backup irons sitting low in the view.
- Match the mount ring diameter exactly to the optic tube size, commonly 1 inch, 30mm, or 34mm.
- Use 7075-T6 aluminum for duty-grade durability, while 6061-T6 is generally adequate for standard range use.
- Verify cheek weld and stock compatibility before committing to a taller mount height, because consistent head position affects repeatable accuracy.
- Install the mount with a certified torque wrench and follow the manufacturer’s torque values to avoid crushing the optic tube or loosening under recoil.
- Prioritize mounts with strong clamping systems and reliable return-to-zero performance if the optic may be removed and reattached.
Frequently Asked Questions
What does lower 1/3 co-witness mean on an AR-15?
It means the optic centerline is typically about 1.57 to 1.64 inches above the Picatinny rail, placing backup iron sights in the lower third of a red dot or holographic sight window.
Can a magnified rifle scope truly co-witness with iron sights?
No. Traditional magnified scopes do not co-witness with irons, but a lower 1/3-style height can still improve head position and help clear fixed front sight posts.
How do I choose the correct ring size for a scope mount?
Match the mount exactly to the optic tube diameter. Common sizes include 1 inch, 30mm, and 34mm, with 34mm often used on larger tactical or long-range scopes.
Is 6061-T6 or 7075-T6 aluminum better for a Picatinny mount?
6061-T6 is usually sufficient for range use, while 7075-T6 offers higher strength and is generally preferred for duty-grade or hard-use rifle setups.
Why does return-to-zero matter in a scope mount?
Return-to-zero measures how closely the optic returns to its original point of impact after removal and reinstallation. Poor repeatability is unacceptable for defensive or duty use.
Post time: Jul-10-2026