
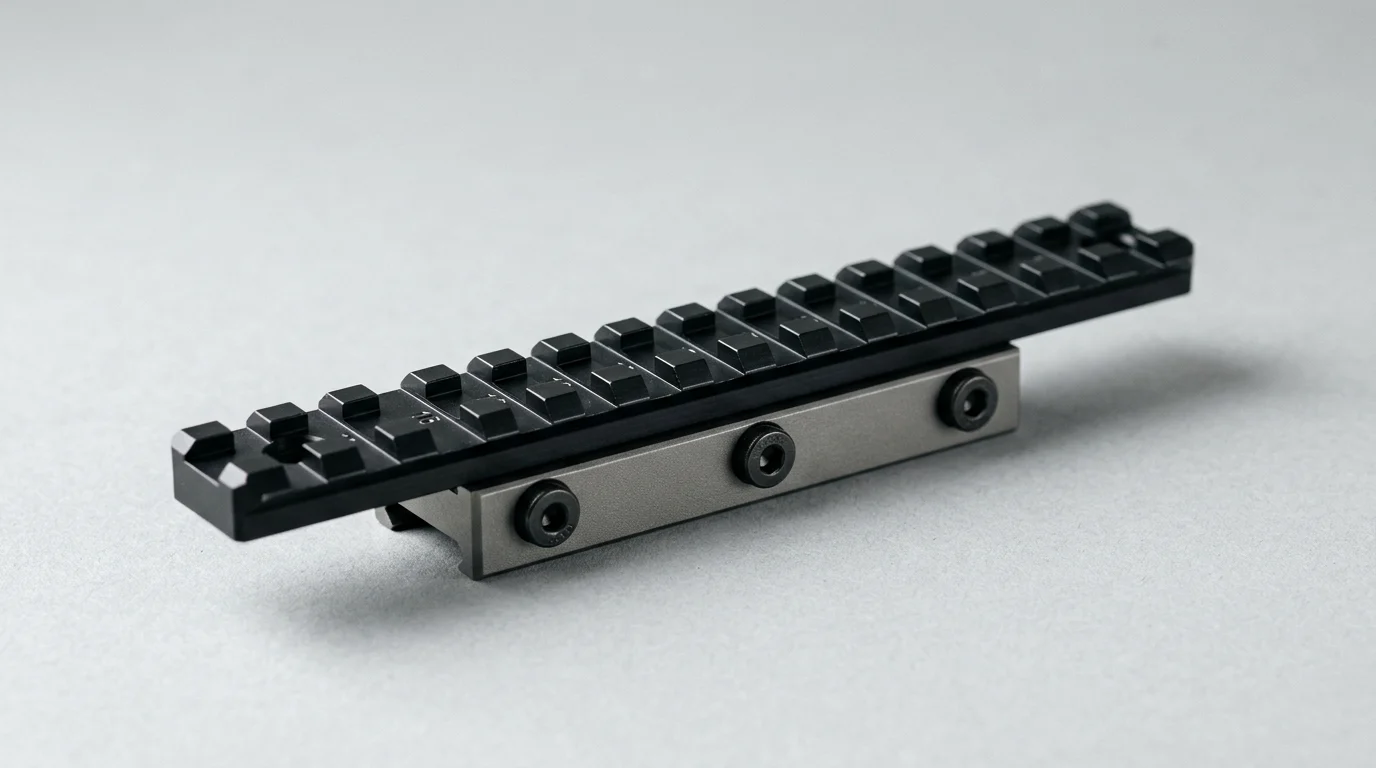
A scope can only hold zero as well as the mount beneath it. The Picatinny rail system, standardized around precise 0.206-inch recoil grooves, gives shooters a dependable platform for swapping and securing optics—but consistency depends on more than rail geometry. Ring alignment, recoil lug placement, thread engagement, and the order in which screws are tightened all affect whether the optic stays stress-free through repeated recoil. This guide explains how a disciplined torque sequence protects the scope tube, preserves internal adjustment function, and helps maintain point of impact. For precision rifles, hunting setups, and hard-use carbines alike, small torque errors can become large accuracy problems.
Picatinny Rail Scope Mounting Basics
A precision rifle setup is only as reliable as the connection between the firearm and its optic. Originally developed at the Picatinny Arsenal in New Jersey, the Picatinny system, standardized under MIL-STD-1913, features uniform recoil grooves measuring exactly 0.206 inches wide. This uniformity allows shooters to swap optics efficiently, but securing a rifle scope onto a rail requires more than simply tightening screws. Proper mounting demands respect for physics, specifically the careful application of torque. Without a methodical approach, even the most expensive glass will suffer from a wandering zero, compromising the precision of the firearm.
Why Torque Sequence Matters
Uneven pressure is the mortal enemy of optical precision. When fasteners are tightened haphazardly, the scope tube can twist, bind, or even crush under the immense clamping pressure. A proper torque sequence guarantees that the clamping force is distributed evenly across the surface area of the rings. If one side of a ring is cranked down to 30 inch-pounds while the other sits at a loose 10 inch-pounds, the internal erector system of the optic can bind, rendering elevation and windage adjustments completely useless. Maintaining a balanced load ensures the scope remains perfectly cylindrical, protecting delicate internal mechanics while resisting the violent forward-and-backward recoil forces generated during firing. Before even considering torque, remember an "Alignment First" rule: an X-pattern torque sequence alone cannot fix inherently misaligned rings. Utilizing alignment bars or lapping the rings is often necessary to ensure a perfectly straight, stress-free fit.
Key Terms and Components
Before grabbing a torque wrench, it is crucial to understand the hardware at play. The foundation is the Picatinny scope base, bolted directly to the receiver to provide a rigid, unyielding mounting platform. Attached to this are the rings or a robust one-piece scope mount, which cradle the optic. Inside the rings, the scope tube must sit perfectly flush to avoid stress fractures. The cross-bolts of the mount feature integrated recoil lugs that interface directly with the rail's slots. Pushing the mount forward against these slots before tightening prevents the optic from sliding under heavy recoil. Additionally, shooters must ensure adequate minimum thread engagement for all screws to prevent stripping under tension. Understanding these components ensures that every twist of the wrench serves to lock the system into a cohesive, rock-solid assembly.
Torque Variables to Compare
Not all hardware is created equal, and treating a delicate aluminum ring screw the same as a heavy-duty steel base bolt is a recipe for stripped threads and damaged equipment. Torque variables depend heavily on the materials used by the manufacturer, the diameter of the screws, and whether chemical threadlocker is applied. Furthermore, reusing old ring screws can be risky, as threads can stretch or degrade over time. Navigating these variables requires comparing manufacturer specifications to avoid catastrophic over-tightening.
Manufacturer Torque Specifications
Manufacturers almost always provide specific torque ratings, and ignoring them is a costly gamble. Crucially, torque values are manufacturer-specific, and the table below provides illustrative ranges only—never a substitute for your equipment manuals. Generally, base screws connecting the rail to the receiver require higher torque, while the delicate ring screws clamping the optic demand a much lighter touch. Torque recommendations also depend heavily on the scope tube diameter—such as 1 inch, 30 mm, or 34 mm—and the specific ring material, rather than just a simple distinction between aluminum and steel. Never assume the higher end of a range is safe for all designs.
| Component | Typical Fastener Size | Recommended Torque (in-lbs) | Material Considerations |
|---|---|---|---|
| Receiver Base Screws | #6-48 or #8-40 | 15 – 25 in-lbs | Often requires blue threadlocker |
| Ring Halves (Top Screws) | T-15 or Hex | 15 – 20 in-lbs | Strictly follow manufacturer limits; varies by tube size and material |
| Cross-Bolts (Rail Attachment) | 1/2" Nut or Torx | 30 – 65 in-lbs | Verify manual; not all mounts tolerate 65 in-lbs |
Consulting the manual for both the optic and the rings is mandatory before proceeding. If the ring manufacturer recommends 20 in-lbs but the scope manufacturer specifies a strict 18 in-lbs maximum, always default to the lowest specified value to prevent tube deformation. If a manufacturer does not publish a torque specification, contact their support team rather than guessing. If specs remain unavailable, default to conservative generic ranges—such as 15 in-lbs for ring caps—to prevent crushing the tube. Never exceed a scope or ring maker's maximum rating, as an over-torqued tube can permanently damage the internal adjustment mechanisms.
Fastener, Ring, and Rail Trade-Offs
The interplay between fasteners, rings, and the rail involves balancing structural strength against overall weight. Steel rings offer immense durability and can often withstand higher torque values, but they add significant heft to the rifle platform. Aluminum rings are lighter and incredibly popular, but their threads yield much faster under excessive force.
Additionally, shooters must consider the role of lubrication. While threadlocker is common on base screws, many manufacturers explicitly discourage using it on ring cap screws. Applying a wet threadlocker (such as Loctite Blue 242) acts as a lubricant during installation. This reduces friction, meaning the exact same torque wrench setting will inadvertently increase the bolt preload and actual clamping force compared to a dry screw. Because of this, wet or threadlocked fasteners usually require a lower torque setting than dry specifications to achieve the same clamping force. Always follow the manufacturer's specific instructions regarding dry or lubricated torque values, and reduce torque appropriately if mounting accessories or fasteners are coated in oil, grease, or liquid threadlocker.
Step-by-Step Mounting Process
With the right specifications in hand, the actual mounting process transforms from a guessing game into a precise mechanical procedure. Setting up a stable workspace is the first step; resting the firearm securely, perhaps utilizing a rifle bipod or a dedicated gun vise, ensures the rifle remains perfectly level throughout the procedure.
Key Takeaways
- Use the manufacturer’s torque specifications for each screw type instead of applying one universal setting across the base, rings, and cross-bolts.
- Tighten ring screws gradually in an alternating X-pattern to distribute pressure evenly and reduce stress on the scope tube.
- Confirm ring alignment before final torque, because a torque sequence cannot correct rings that are already out of line.
- Seat the mount forward against the Picatinny recoil slots before tightening so recoil forces are resisted consistently.
- Check that screws have adequate thread engagement and avoid reusing damaged or stretched hardware when precision zero retention matters.
- Use a calibrated inch-pound torque wrench to prevent both under-tightening that allows movement and over-tightening that can damage the optic.
Frequently Asked Questions
Why does torque sequence matter when mounting a scope on a Picatinny rail?
A proper sequence spreads clamping force evenly across the rings, helping prevent tube twist, optic stress, and a wandering zero under recoil.
Should I tighten Picatinny scope rings in an X-pattern?
Yes, an alternating X-pattern is commonly used to balance pressure, but it cannot fix misaligned rings. Confirm alignment before applying final torque.
What torque value should I use for scope ring screws?
Use the manufacturer’s specified inch-pound value for your exact rings or mount. Different screw sizes and materials require different torque settings.
Can over-tightening damage a rifle scope?
Yes. Excessive torque can crush or distort the scope tube and may bind the internal erector system, affecting elevation and windage adjustments.
Why should the mount be pushed forward in the rail slot before tightening?
Pushing the recoil lugs forward against the Picatinny slots helps seat the mount consistently and reduces movement during recoil.
Post time: Jul-10-2026