

Proper scope mounting ensures consistent accuracy during shooting. Misaligned components or incorrect torque can lead to losing zero, frustrating users. Following the correct mounting process, including precise torque application, minimizes errors. A securely mounted scope enhances performance and reliability, giving shooters confidence in their equipment under various conditions.
Key Takeaways
- Use proper tools, like a torque wrench and leveling kit, to install the scope securely and correctly.
- Tighten screws in the right order to avoid over-tightening or under-tightening, which can harm the scope or affect accuracy.
- Check and care for your scope and mounts often to keep them working well for a long time.
Preparation for a Successful Mount
Essential Tools and Equipment
Using the right tools ensures a secure and accurate scope installation. A torque wrench is essential for tightening screws to the manufacturer’s specifications, preventing over-tightening or loosening. A leveling kit helps align the scope with the rifle action, ensuring precision. A gun vise stabilizes the firearm during the process, reducing the risk of misalignment.
Other helpful items include a bubble level to confirm the rifle’s orientation and cleaning supplies like degreaser to remove oil or residue from contact surfaces. Applying blue Loctite to screws can prevent them from loosening due to recoil. These tools and materials simplify the mounting process and improve long-term performance.
Setting Up a Stable Workspace
A stable workspace is critical for a successful mount. Start by ensuring the firearm is unloaded. Double-check the chamber and magazine for safety. Use a gun vise to hold the rifle securely and keep it level. Clean the mounting surface thoroughly with a degreaser to eliminate oil or debris that could affect the connection.
Install the base according to the manufacturer’s instructions, using a torque wrench to tighten screws to the recommended levels. This step ensures a solid foundation for the scope. Proper preparation minimizes errors and enhances accuracy.
Tip: Always work in a well-lit area to spot any alignment issues or debris during the process.
Inspecting the Scope and Mounting Components
Thoroughly inspect the scope and mounting components before installation. Check for any visible damage, such as scratches or dents, that could affect performance. Handle the scope carefully, especially the distal end, to avoid impacts that might damage the imaging quality.
Ensure the scope rings and bases are compatible with the rifle and scope. Perform a leak test to confirm the integrity of the scope’s channels. Use appropriate containers for transport to prevent damage during handling. Following these inspection protocols reduces the risk of issues after installation.
Step-by-Step Instructions to Mount a Scope
Positioning the Scope and Rings
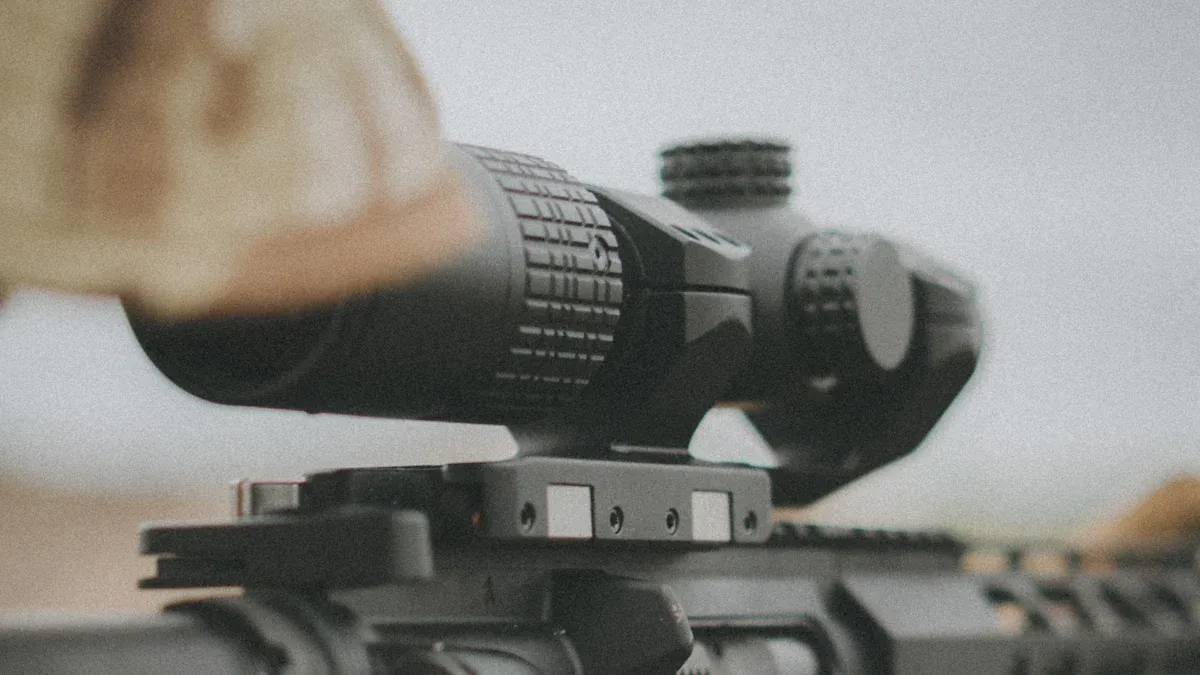
Proper positioning of the scope and rings lays the foundation for a secure and accurate mount. Begin by placing the rifle on a stable platform, such as a gun vise or secure rest. This ensures the rifle remains steady throughout the process. Next, attach the scope mounts to the rifle. Depending on the setup, this may involve using a rail system or individual scope rings. Apply blue Loctite to the screws to prevent loosening due to recoil, and tighten them evenly to approximately 25 inch-lbs using a torque wrench.
Once the mounts are secure, position the scope within the rings. Adjust the scope forward or backward to achieve optimal eye relief, ensuring the entire field of view is visible without any dark edges. Tighten the top halves of the rings just enough to hold the scope in place while still allowing for minor adjustments.
Tip: Always check that the scope rings are aligned with the rifle’s bore to avoid misalignment issues later.
Aligning the Reticle for Accuracy
Aligning the reticle is critical for precision shooting. Start by leveling the rifle using a bubble level or leveling kit. Place the level on the rifle’s action or a flat surface to ensure it is perfectly horizontal. Once the rifle is level, adjust the scope so the vertical crosshair aligns with the rifle’s chamber.
To confirm alignment, sight through the scope and ensure the reticle is straight. A common method involves placing a plumb line or a vertical reference, such as a doorframe, in the scope’s field of view. Rotate the scope until the vertical crosshair matches the reference line.
Note: Proper reticle alignment minimizes horizontal point-of-impact errors, especially at longer distances.
Applying the Correct Torque Sequence
Applying the correct torque sequence prevents damage to the scope and ensures it holds zero during use. Begin by tightening the screws on the scope rings incrementally. Use a crisscross pattern to distribute pressure evenly across the scope. Tighten each screw to the manufacturer’s recommended torque setting, typically between 15-25 inch-lbs.
Avoid over-tightening, as this can damage the scope tube or distort the reticle. Similarly, under-tightening can lead to slippage during recoil, causing a loss of zero. A torque wrench is essential for achieving the correct balance.
Reminder: Following the proper torque sequence enhances stability and prevents scope shift during shooting.
Adjusting Eye Relief and Leveling the Scope
Eye relief adjustment ensures a clear and comfortable view through the scope. Shoulder the rifle in a natural shooting position and move the scope forward or backward within the rings. Adjust until the entire field of view is visible without any vignetting or aberrations. Mark the scope’s position with masking tape to maintain the correct eye relief during the leveling process.
Once eye relief is set, recheck the scope’s level. Use a bubble level to confirm that the reticle remains aligned with the rifle’s bore. Tighten the scope rings fully, following the same crisscross torque sequence.
Safety Tip: Proper eye relief prevents the scope from striking the shooter’s face during recoil, especially when using high-power rifles.
Avoiding Common Mounting Mistakes
Over-Tightening or Under-Tightening Screws
Improper torque application is one of the most frequent mistakes during scope installation. Over-tightening screws can strip threads, damage fasteners, or distort components, compromising the integrity of the mount. On the other hand, under-tightening screws may result in the scope shifting during recoil, leading to a loss of zero.
To avoid these issues, always follow the manufacturer’s recommended torque settings. These guidelines typically suggest maintaining clamp load levels between 62% and 75% of the bolt’s yield strength. Using a torque wrench ensures precise tightening and prevents overstretching bolts, which could cause permanent deformation.
Tip: Incrementally tighten screws in a crisscross pattern to distribute pressure evenly and maintain stability.
Misalignment of Scope or Rings
Misalignment between the scope and rings can significantly impact shooting accuracy. A misaligned scope mount may cause shifts in the point of impact (POI) as the shooting distance changes. This issue can also exert uneven pressure on the scope, potentially damaging it and reducing long-range accuracy.
To address this, ensure the scope rings are properly aligned with the rifle’s bore. Use a bubble level or leveling kit to confirm alignment during installation. If misalignment persists, consider shimming the rings or adjusting the scope’s position. High-quality materials and precise manufacturing processes in scope mounts can also help maintain alignment and accuracy over time.
Note: Even minor misalignments can lead to significant accuracy issues, especially at longer distances.
Skipping Incremental Tightening
Skipping incremental tightening during the mounting process can lead to uneven pressure distribution across the scope. This mistake increases the risk of bolt load scatter, crosstalk, and relaxation after the initial tightening. These factors can compromise the stability of the mount and reduce shooting accuracy.
Incremental tightening involves tightening screws in small, even steps while alternating between them in a crisscross pattern. This method ensures better parallel alignment of flange faces and minimizes bolt load scatter. Additional tightening passes help reduce relaxation, enhancing the overall stability of the mount.
Reminder: Incremental tightening not only improves alignment but also extends the lifespan of the mounting components by reducing stress on individual screws.
Troubleshooting After the Mount
Identifying and Fixing Scope Shift
Scope shift can occur due to improper mounting or recoil forces. Identifying the root cause is essential to restore accuracy. Start by checking the scope rings and base for any signs of movement or loosened screws. A visual inspection often reveals misalignment or gaps between components.
Monitoring tools, such as guiding performance software, can help detect subtle shifts. For example, PHD2 software highlights issues like mount shifts or star fading, which can indicate scope misalignment. If using a German equatorial mount, recalibrate after a meridian flip to maintain alignment. Addressing these problems promptly prevents significant drift off-target.
Tip: Always verify the scope’s zero after making adjustments to ensure consistent performance.
Re-Torquing Screws for Stability
Re-torquing screws is a critical step in maintaining a stable mount. Use a torque wrench to tighten screws incrementally, following the manufacturer’s specifications. Ensure the wrench is fully seated in the screw head to avoid stripping or damage. Consistent torque application prevents slippage and protects the scope from unnecessary stress.
Torque guidelines often allow flexibility, as exact numbers may vary with manufacturing processes. Focus on achieving uniform pressure across all screws rather than obsessing over precise values. Regularly re-torquing screws, especially after extended use, ensures long-term stability and reliability.
Reminder: Periodic checks and adjustments can prevent unexpected shifts during critical moments.
Ensuring Long-Term Accuracy and Performance
Maintaining accuracy over time requires proactive care. Clean the scope and mounting components regularly to remove debris or residue that could affect alignment. Inspect the screws and rings for wear, replacing any damaged parts immediately.
Consistent torque application plays a vital role in preserving performance. Updated torque specifications from manufacturers should guide adjustments. Additionally, using high-quality mounting hardware reduces the risk of misalignment or failure.
Note: Routine maintenance and attention to detail ensure the scope remains reliable, even under demanding conditions.
Proper scope mounting begins with thorough preparation and precise alignment. Following the correct torque sequence ensures stability and accuracy. Avoiding common mistakes, such as over-tightening screws, protects the equipment.
Reminder: Attention to detail during installation guarantees consistent performance. By following these steps, shooters can achieve reliable results and long-term success.
FAQ
What is the ideal torque setting for scope rings?
Most manufacturers recommend 15-25 inch-lbs for scope rings. Always refer to the specific guidelines provided with your mounting hardware for accuracy.
How often should screws be re-torqued?
Re-torque screws after the first few shooting sessions. Periodic checks every few months or after heavy use ensure long-term stability and performance.
Can I mount a scope without a torque wrench?
While possible, it is not recommended. A torque wrench ensures precise tightening, preventing damage or misalignment caused by over-tightening or under-tightening screws.
Post time: May-09-2025